Digital Story: Creating & Editing
Understand how to create and edit the Digital Story that's behind the QR code on a Plaque!
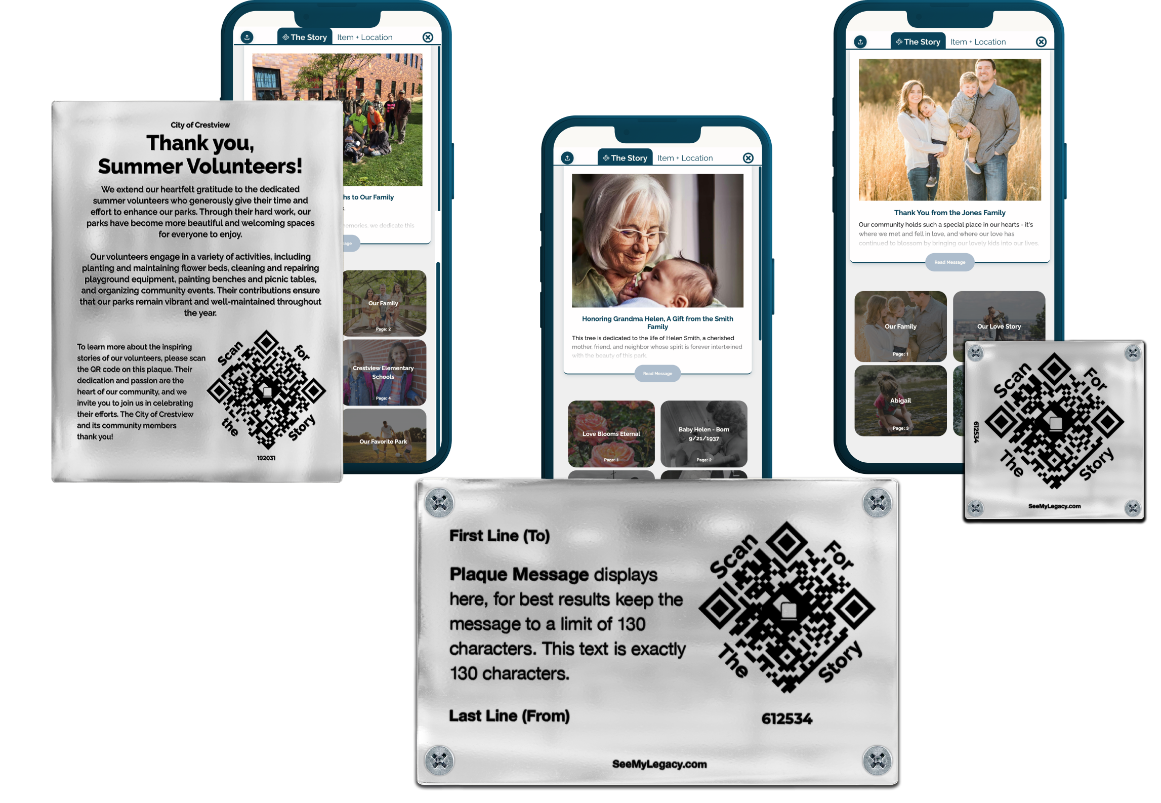

Preserve Your Community's Legacy and Stories
Community Stories preserve the memories and experiences that define what makes your community special. Digital Stories make it easy for anyone to share what matters to them through an interactive digital scrapbook with photos, captions, and links. These stories bring people together and help preserve the legacy that has shaped your Community.
All kinds of Digital Stories can be told through our QR Plaques!
Digital Story Components
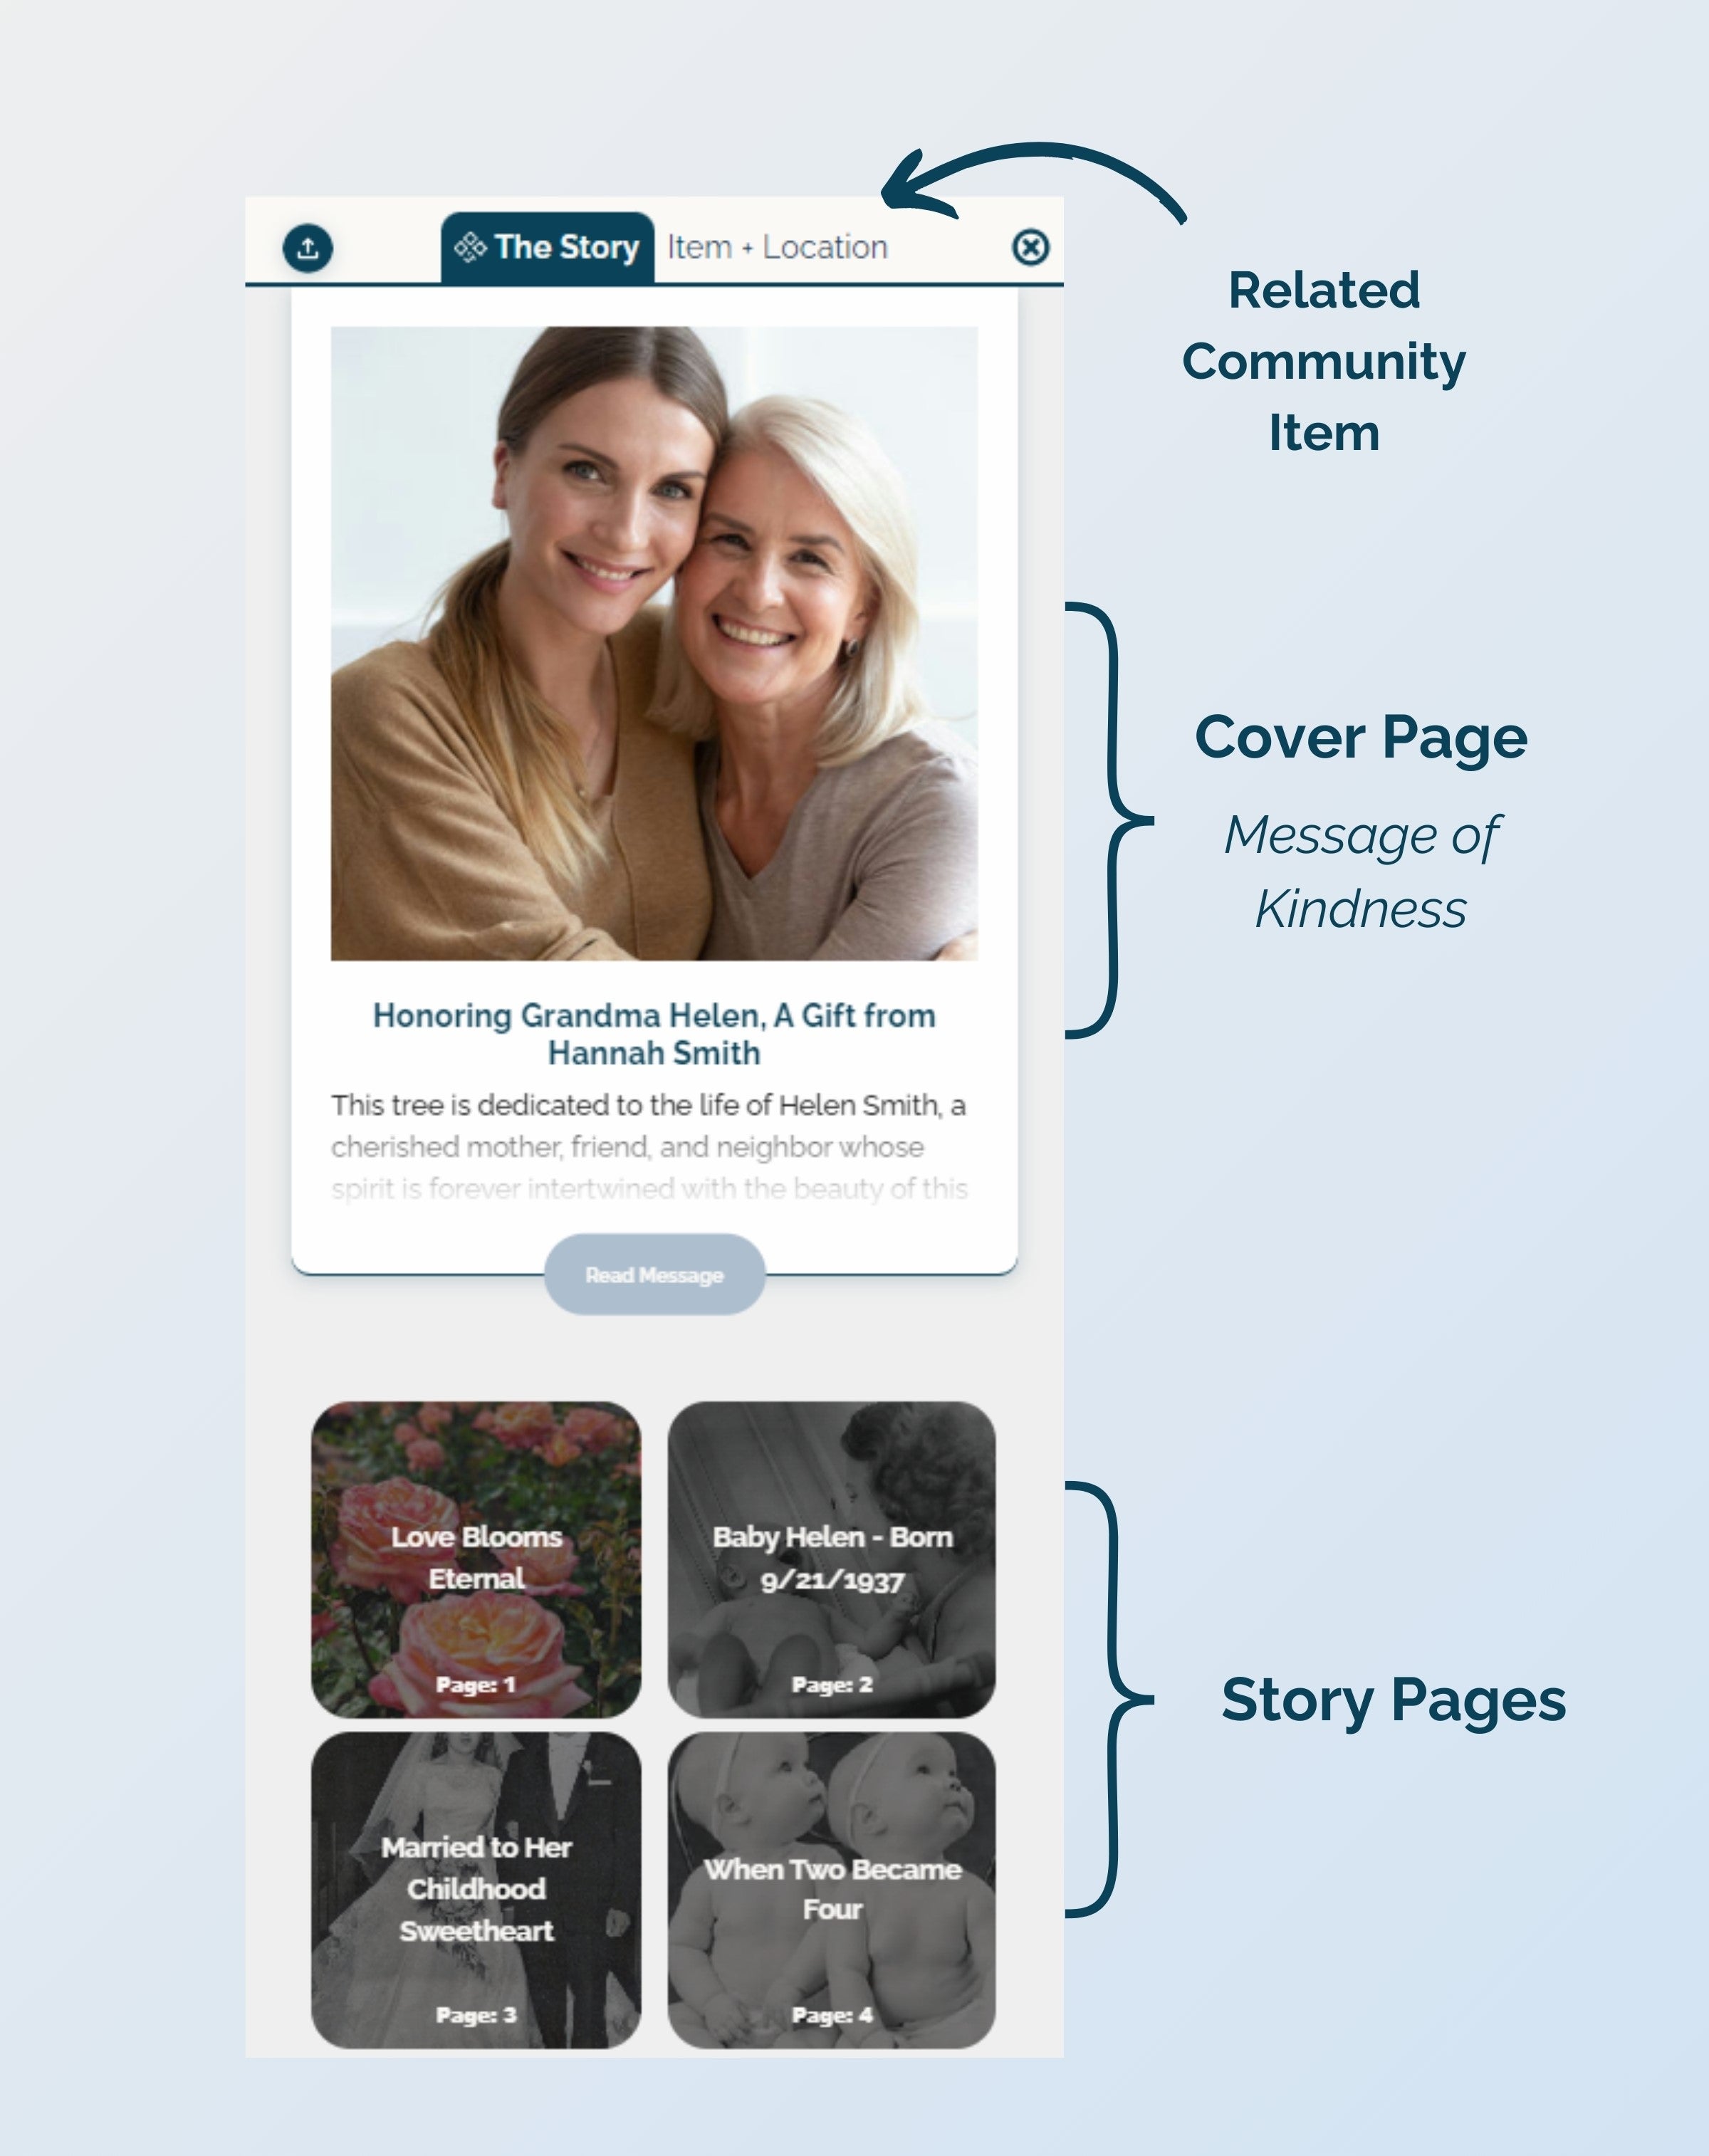
A Digital Story has two main components -
- Cover Page - this is the introduction to your Story and includes a title, image, and Message of Kindness.
- Story Pages - these are what make up the bulk of your Story and can include a title, photo, caption, and link.
Content inside of a Story can be edited at any time - you can imagine growing your Story as you have more to celebrate or share within it.
How to Edit a Story
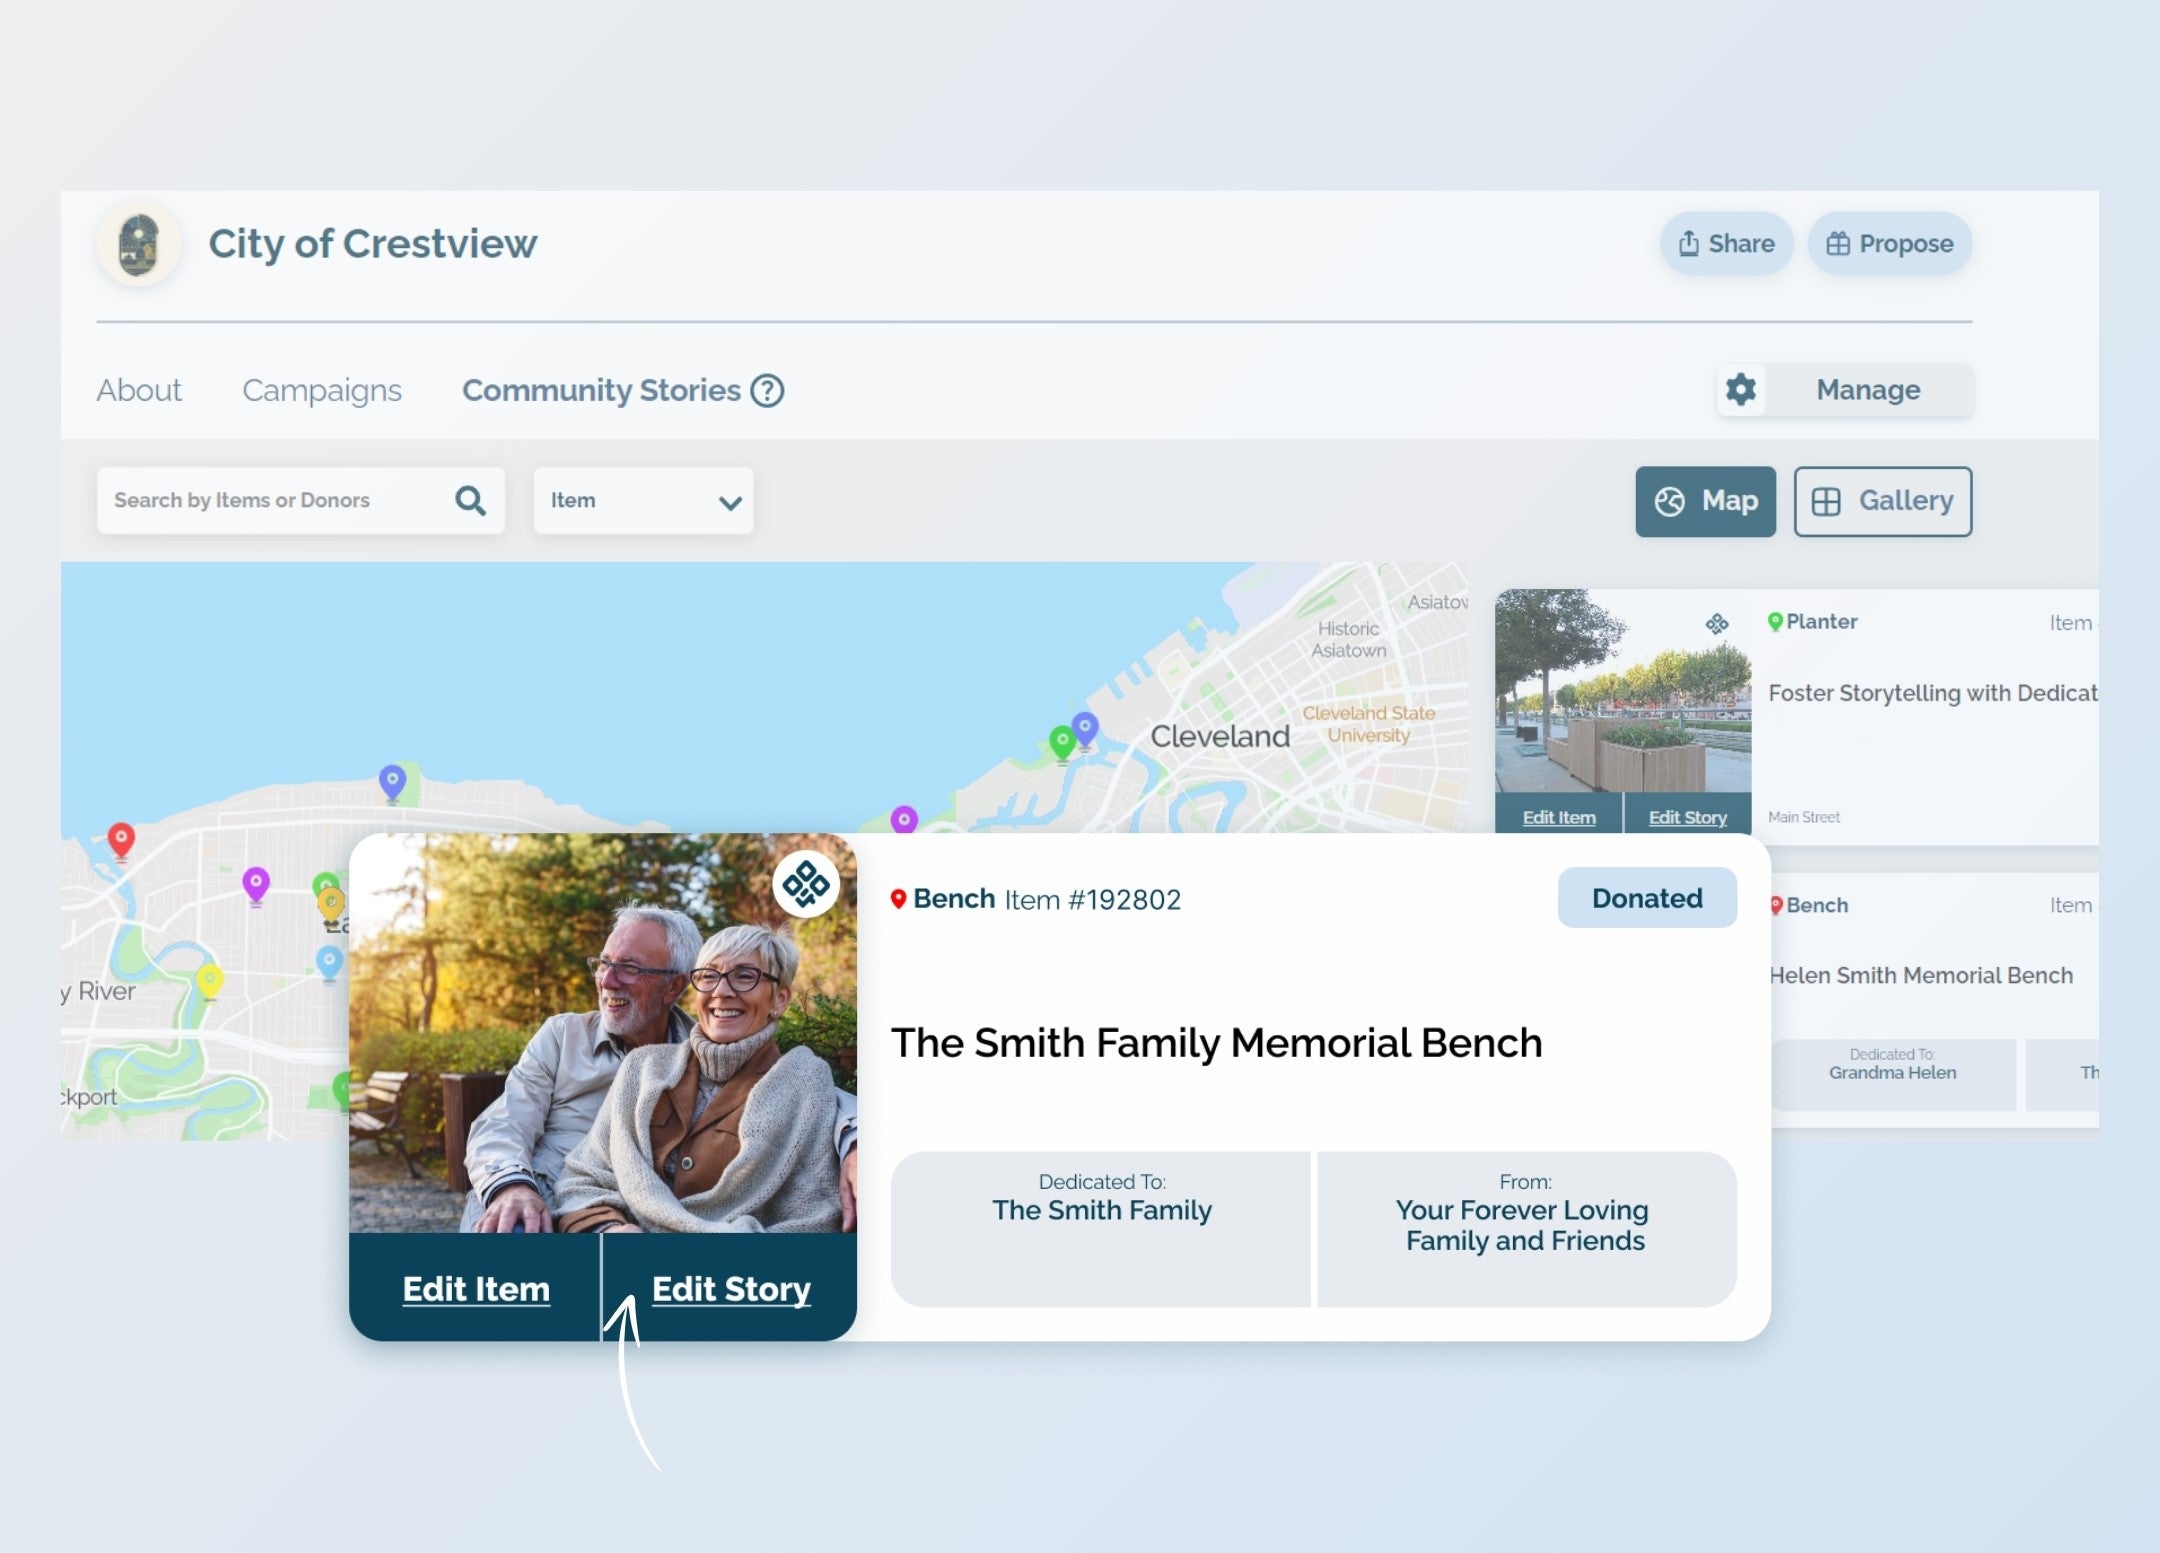
Once you've attached a QR Plaque to an Item, you have the ability to start editing your Digital Story. Go to your 'Community Stories' tab and click on 'Edit Story' to begin your storytelling journey!
How to Edit a Story
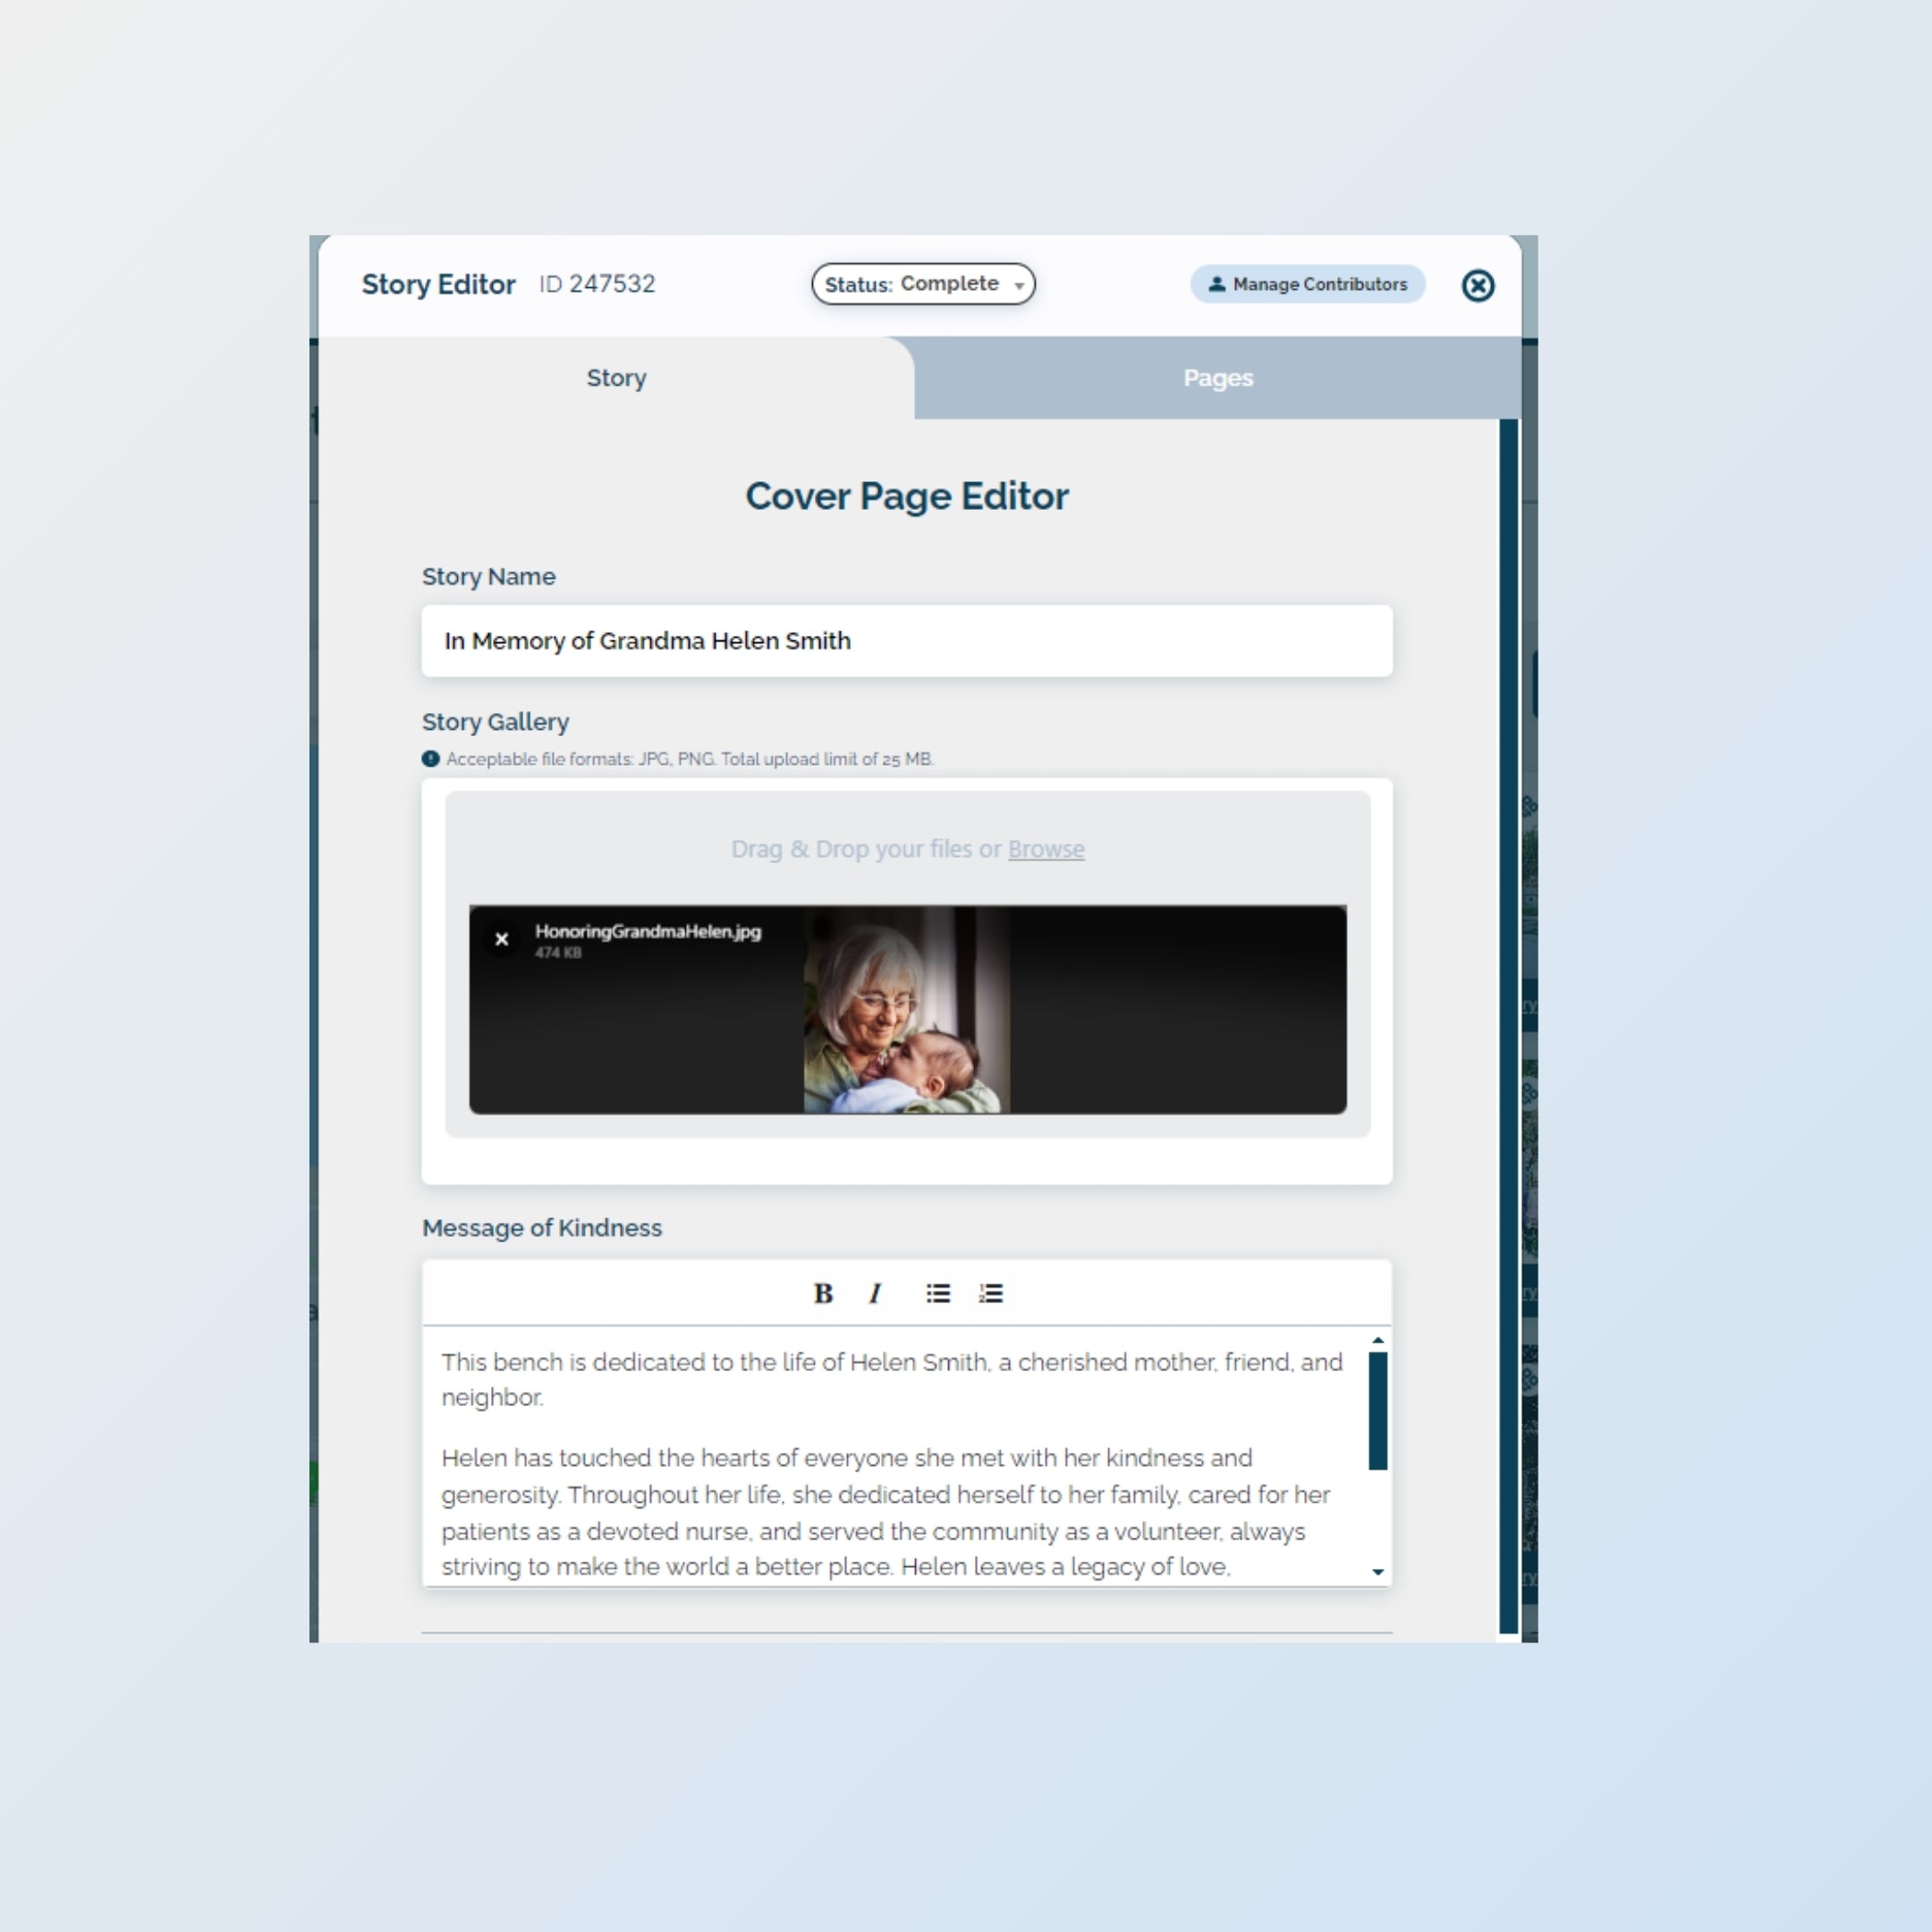
Editing the Cover Page
A Story's Cover Page is the introduction to a Story - it's where one can share more information about the purpose behind their gift before getting into the contents of the Digital Story. A Cover Page includes -
- Story Name
- Story Photo Gallery
- Message of Kindness (just an open text box that can be used to thank or mention anyone who helped enable your ability to share a Digital Story)
How to Edit a Story
Editing the Story Pages
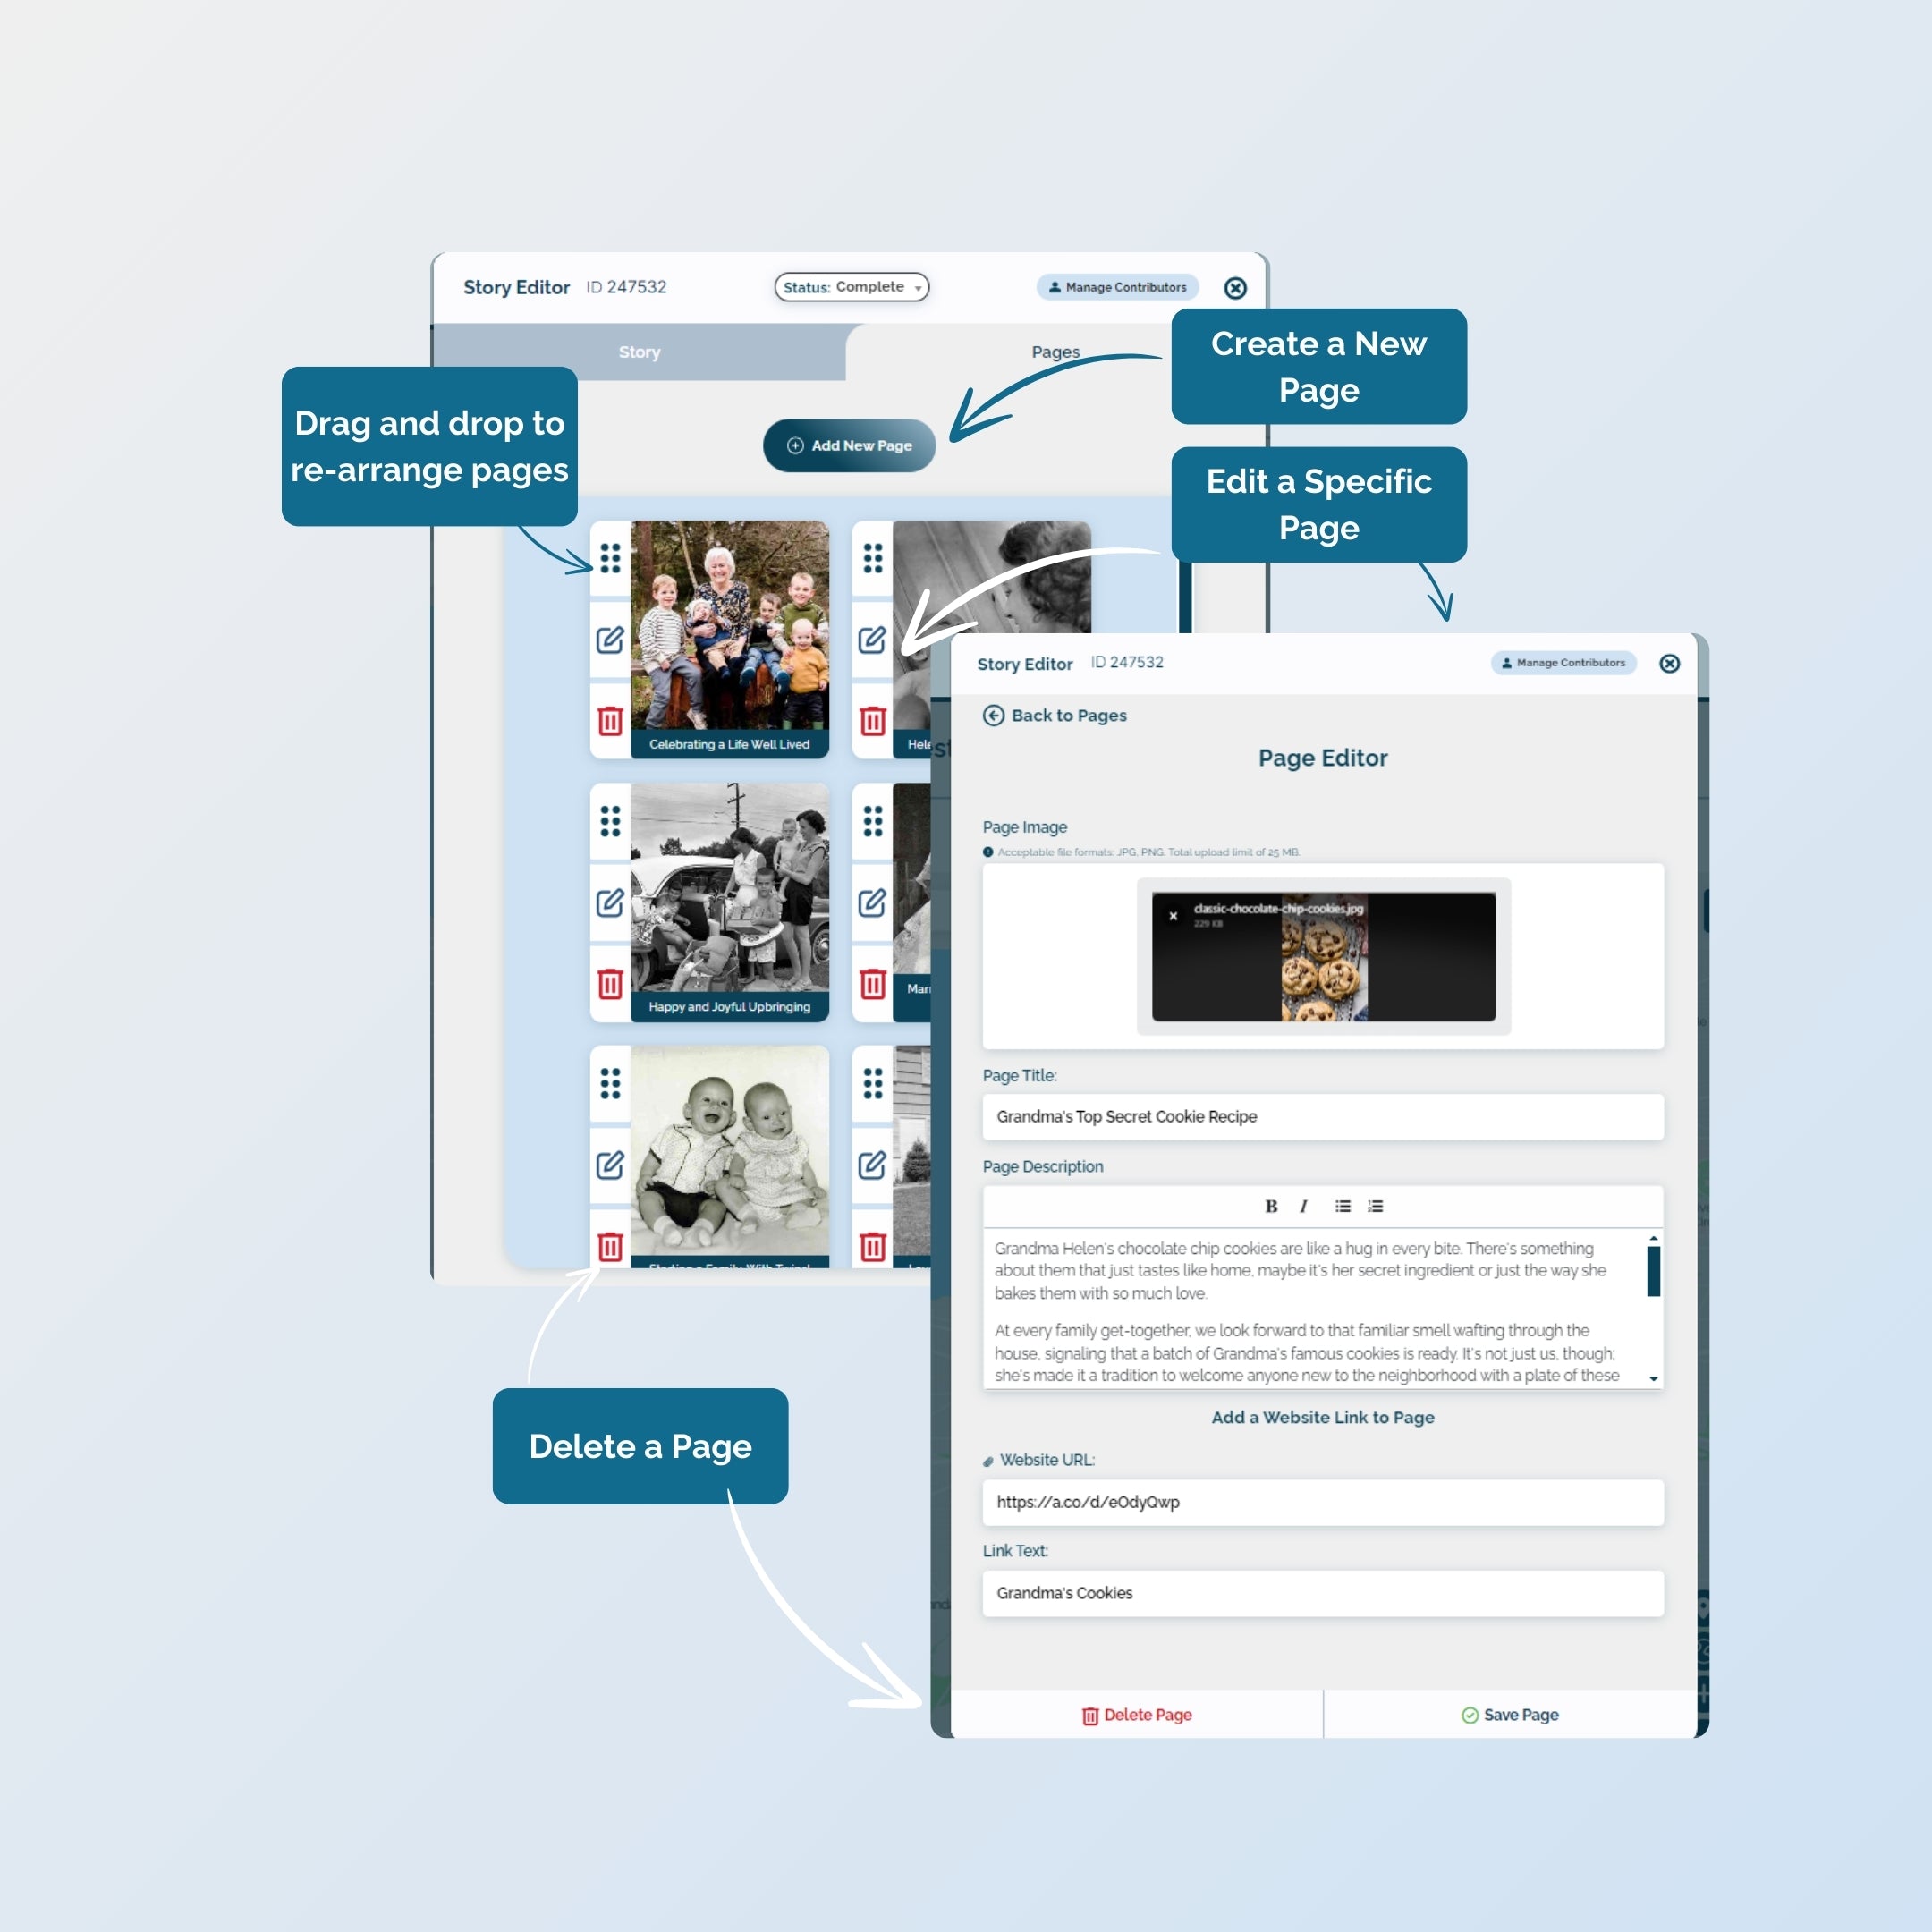
The Story Pages are what contain a lot of the fun and beautiful messages and images that you or your Community members can share. From within the Story Editor, click on the 'Pages' tab.
- Create a Story Page - Click 'Add New Page' to begin crafting your Story.
- Edit a Story Page - To edit the content of a specific page, click the pencil icon. You can add a photo, title, caption, and a link.
- Re-Arrange Story Pages - Click on the button with the dots to drag and rearrange the order of your Story Pages.
- Delete Story Pages - From within the Page Editor or from the Page Layout Editor, find the red trashcan button to delete the page.
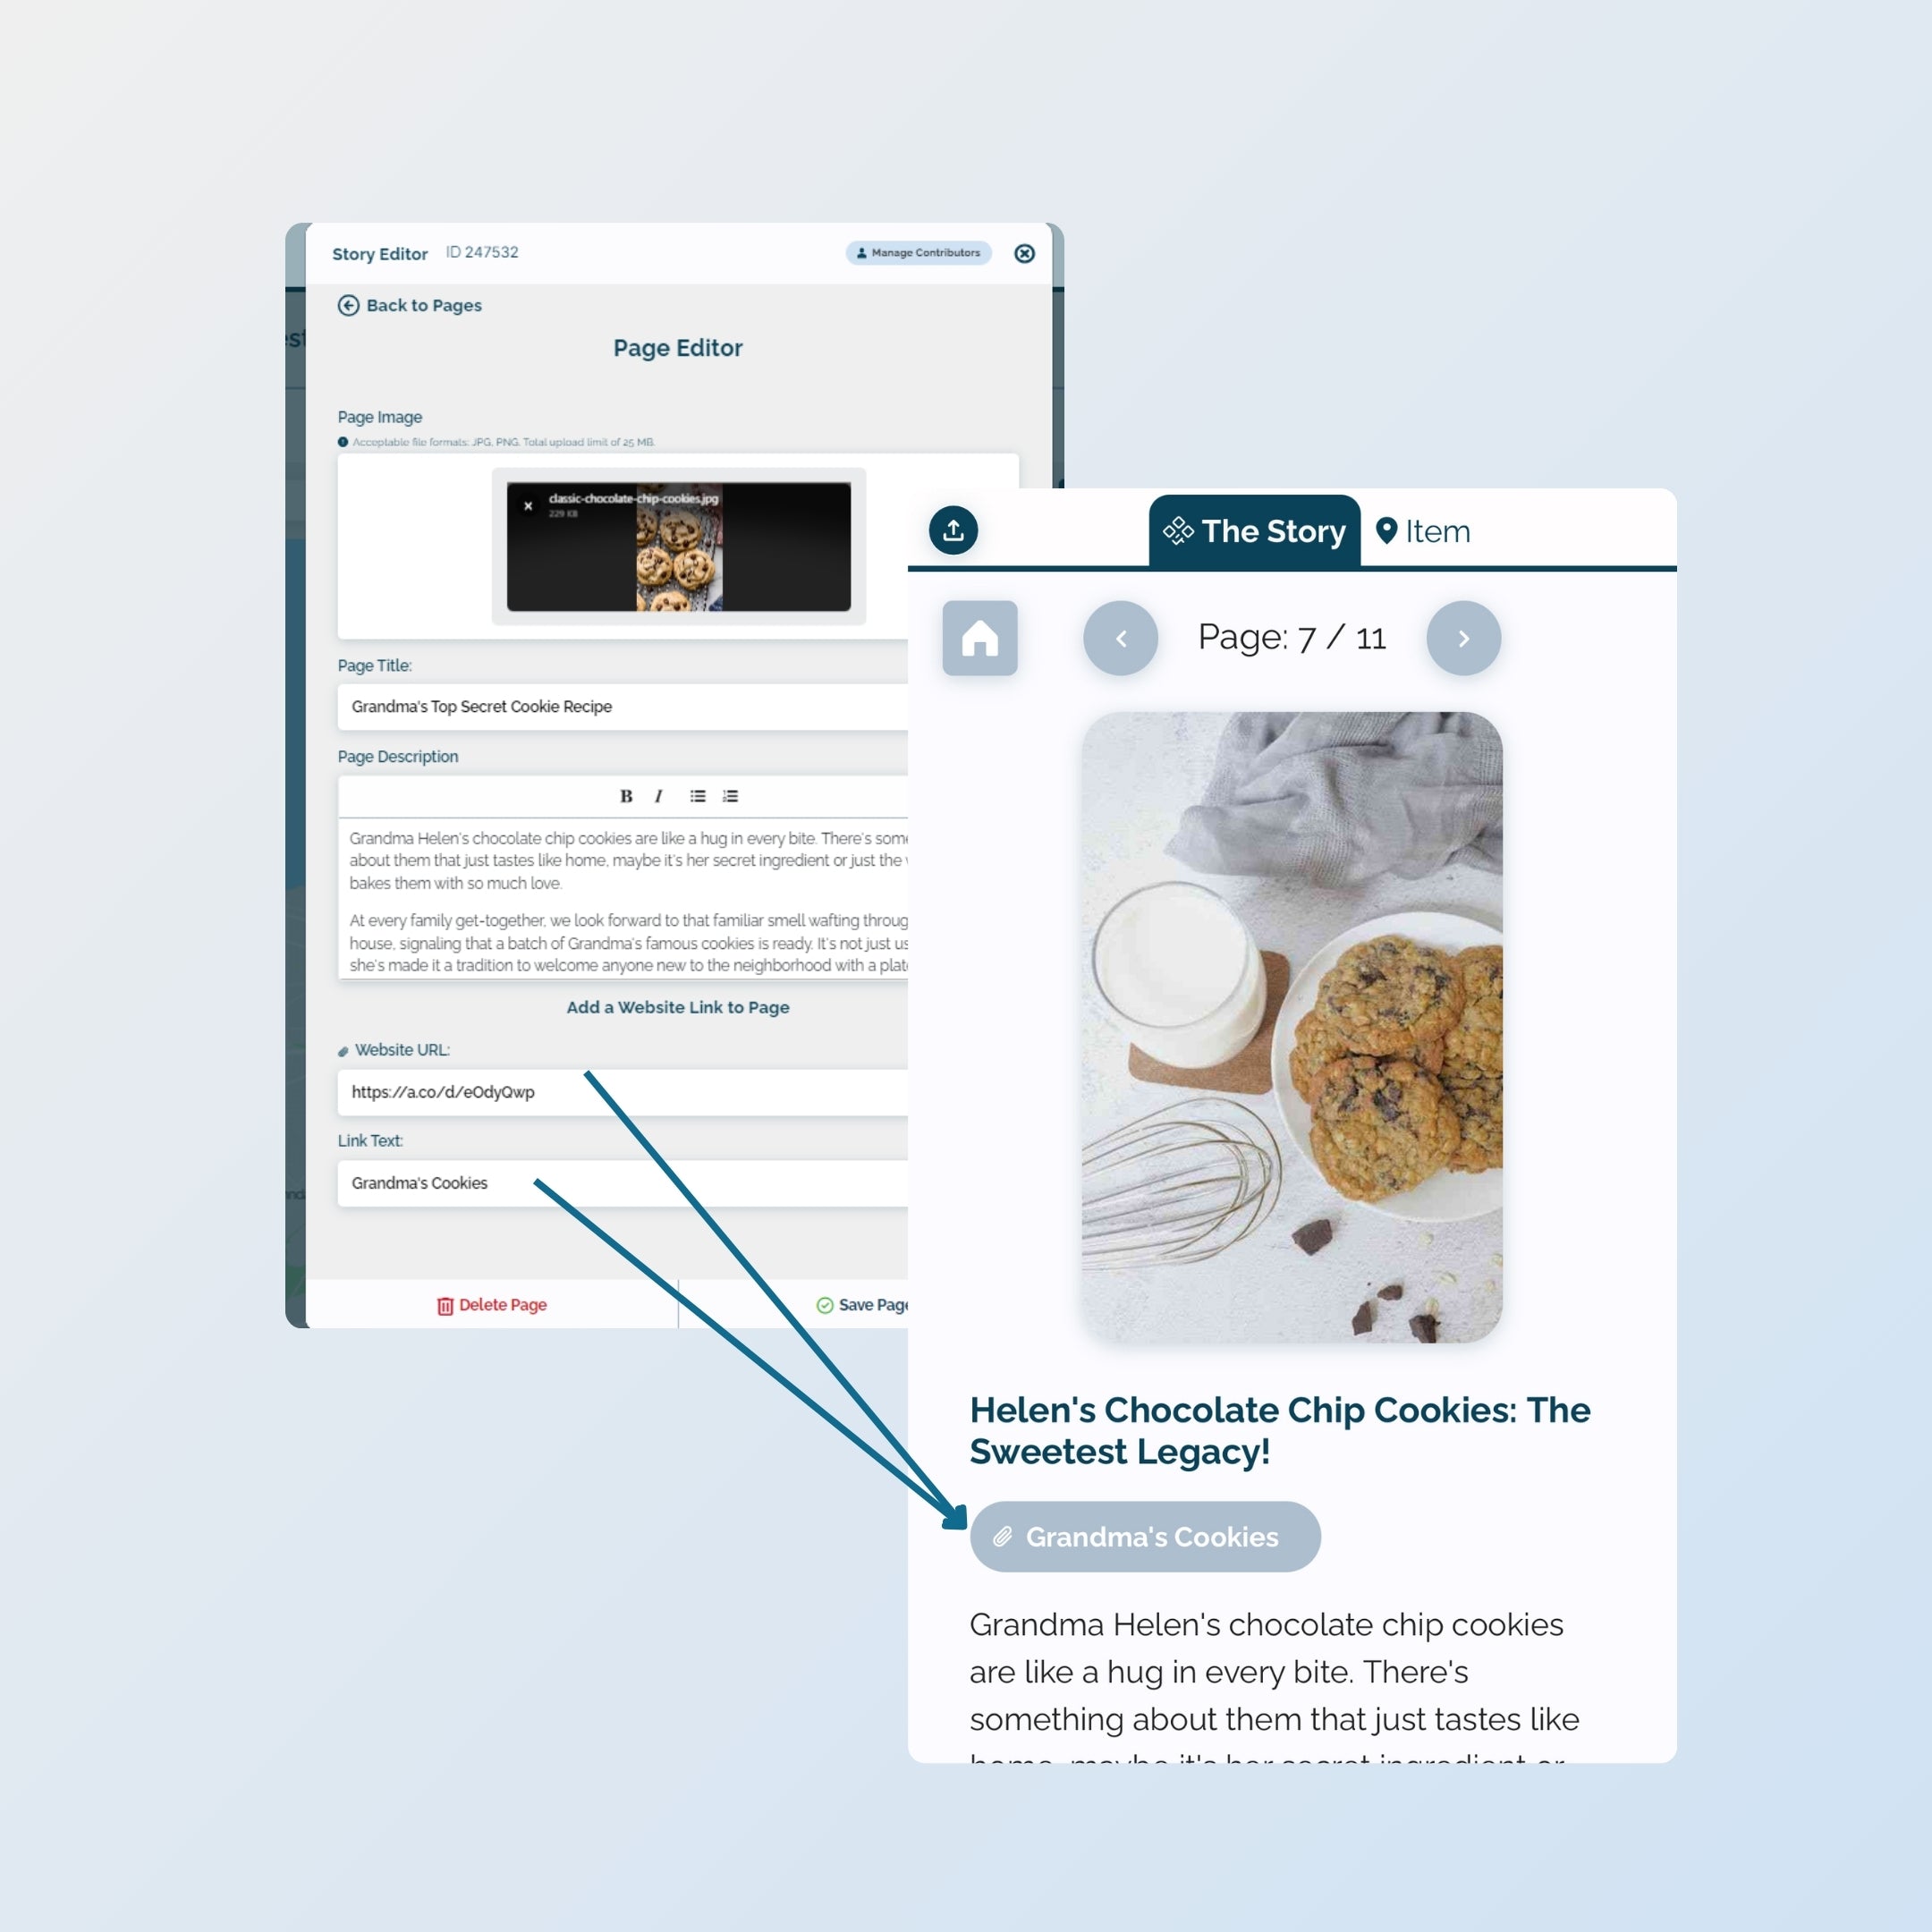
Each Story Page has the option to have -
- Page Image
- Page Title
- Page Description
- Website URL & Link Text - for links, put the text that you want to display as the clickable link in 'Link Text' - you can see this example with a link to Grandma's Cookies!

Managing Story Visibility
Digital Stories can be viewed publicly on your Community Profile from within the 'Community Stories' tab when -
1. Item is marked Posted = Yes
2. Story Status is marked = Complete
Be sure to update both of these fields before installing your physical Plaque so that the Story and Item can be seen when someone scans the QR code in the real world.
Inviting Others to Collaborate on Creating a Story
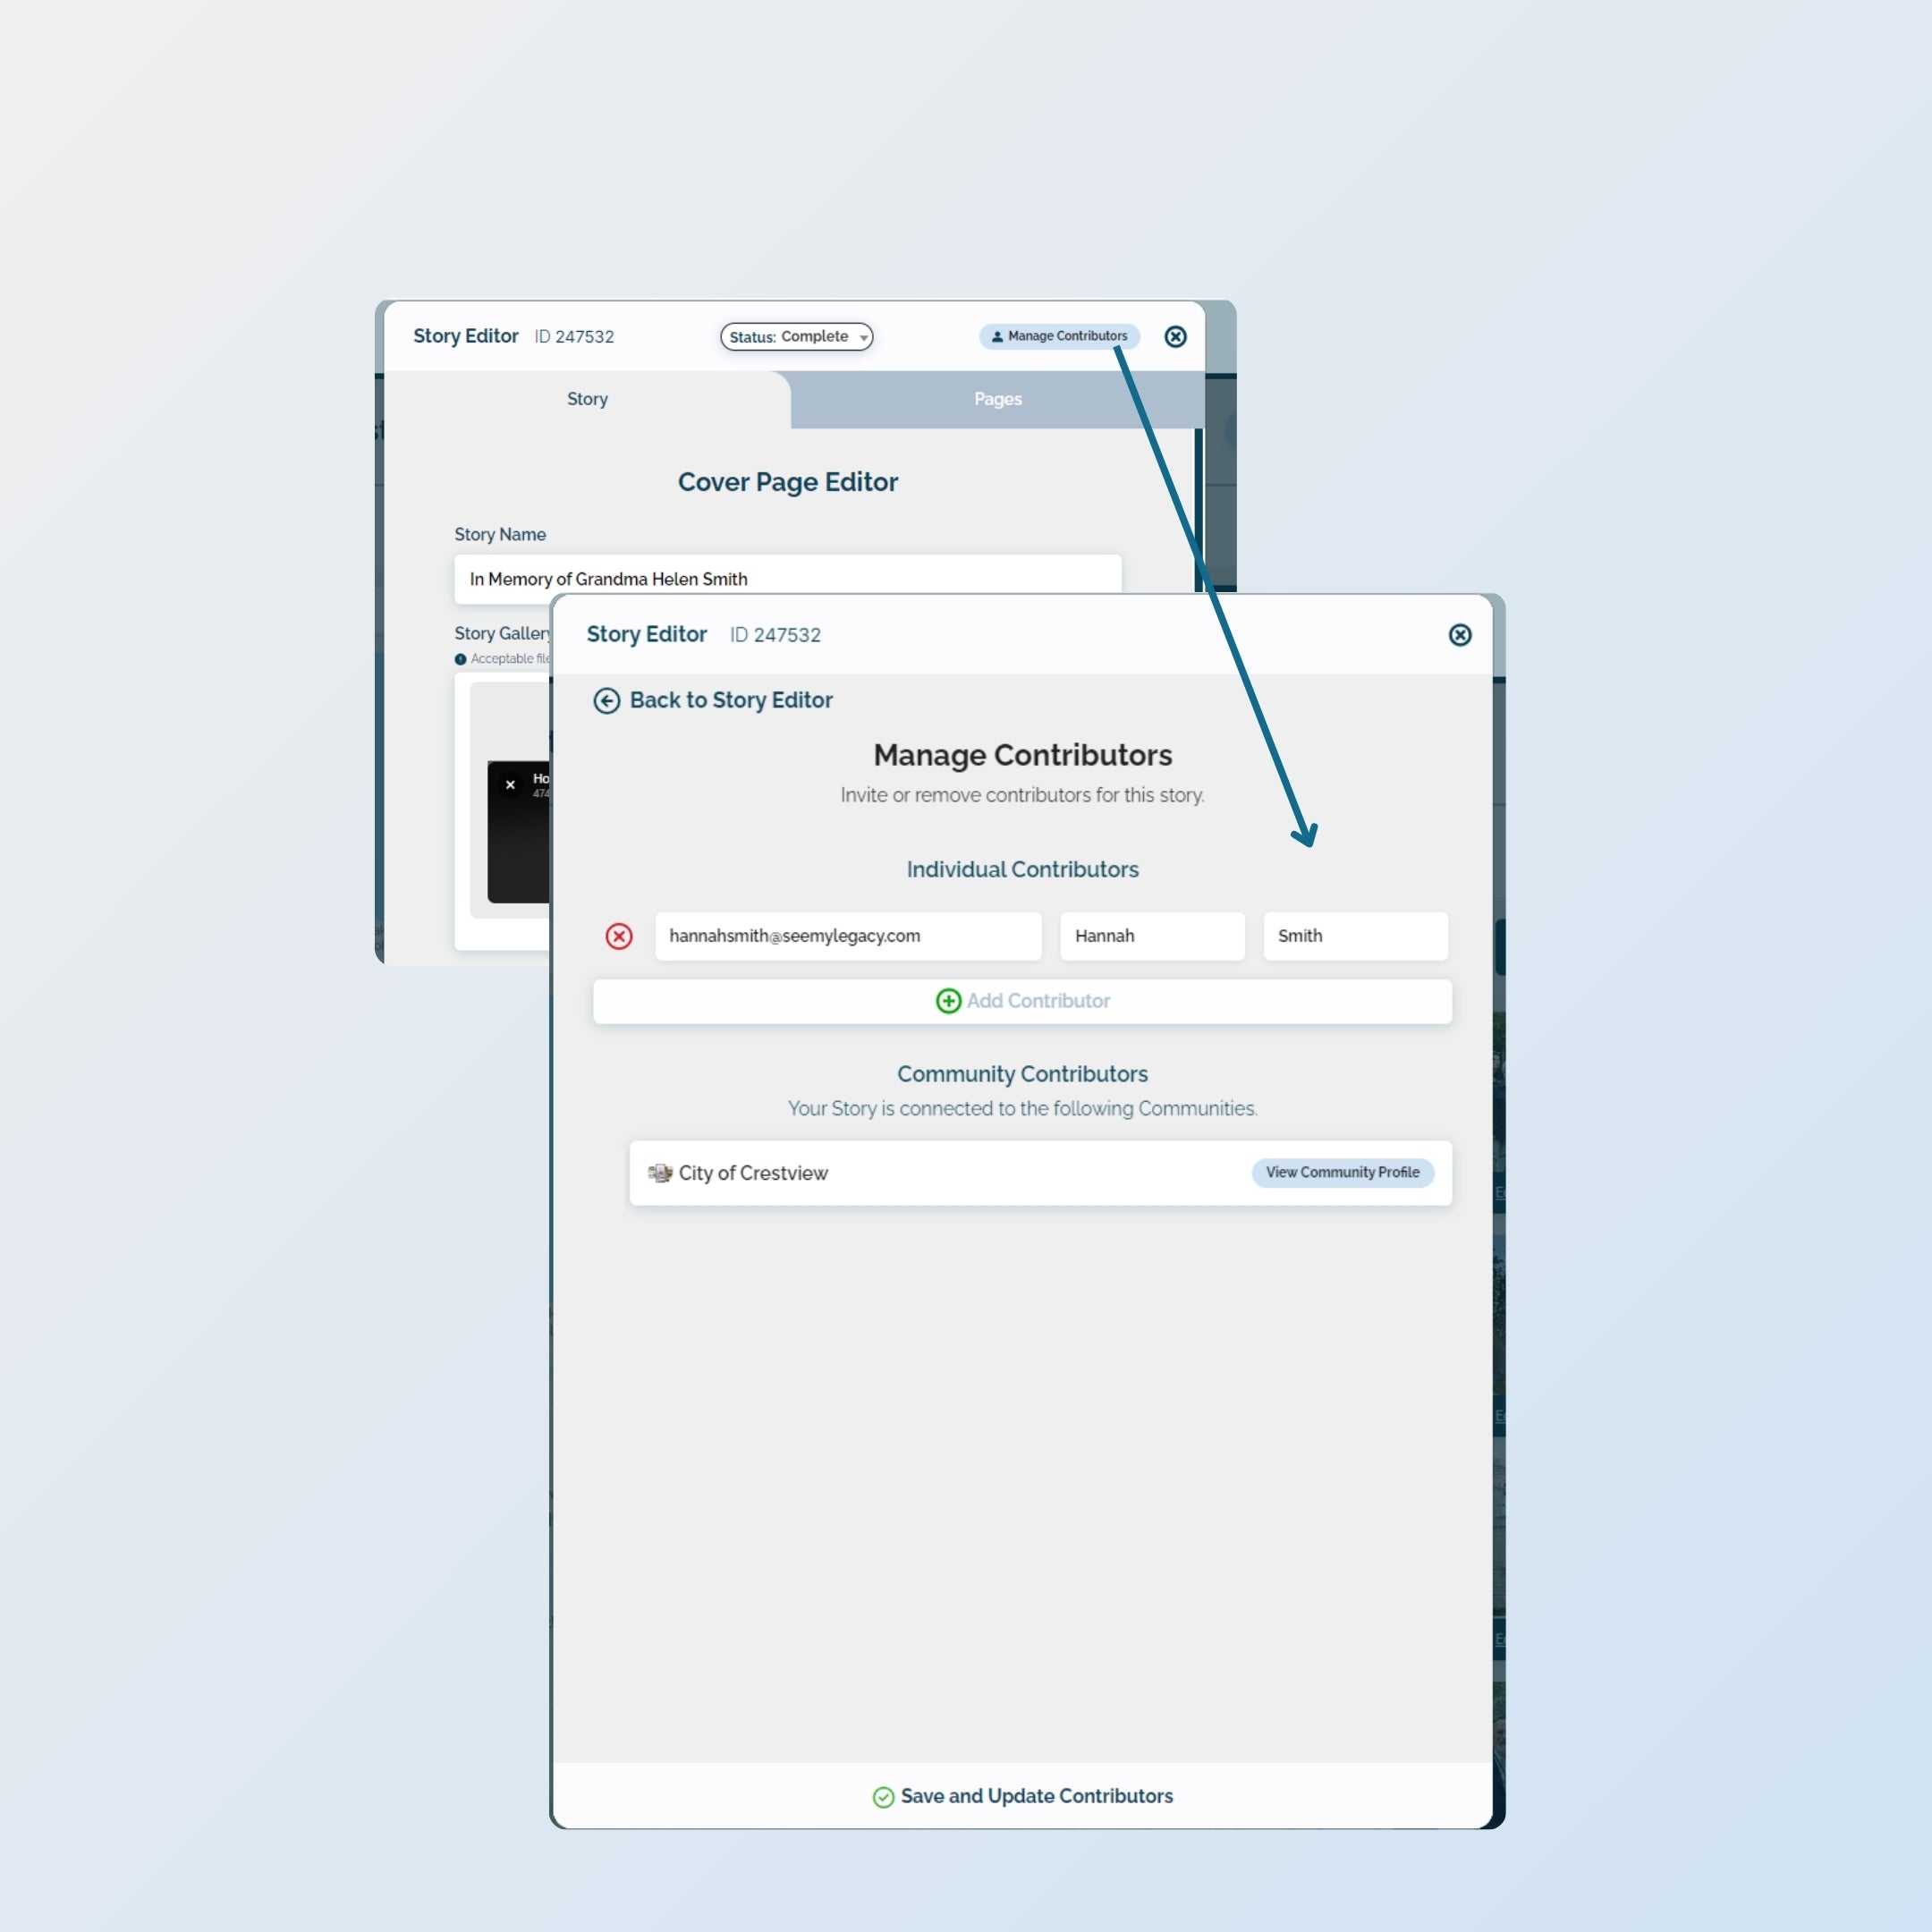
If it makes sense to have certain Digital Stories have their content edited by their donors, you can invite them using the 'Manage Contributors' function.
Click the 'Manage Contributors' button to add in the email address of anyone you'd like to help edit the Digital Story. Inviting an individual here will send them an email inviting them to sign up or log in to SeeMyLegacy. Individual contributors can be removed or added at any time.
Story Examples
Explore and discover great Community Stories
Our library of Stories are a great way to break writer's block!
Explore our various examples and get inspired on the Stories and Items a Community can bring together.


