Digitizing Your Items for Storytelling
Learn about how Storytelling Items work in your Community.


Understanding How Items Power Stories
Stories belong in the real world.
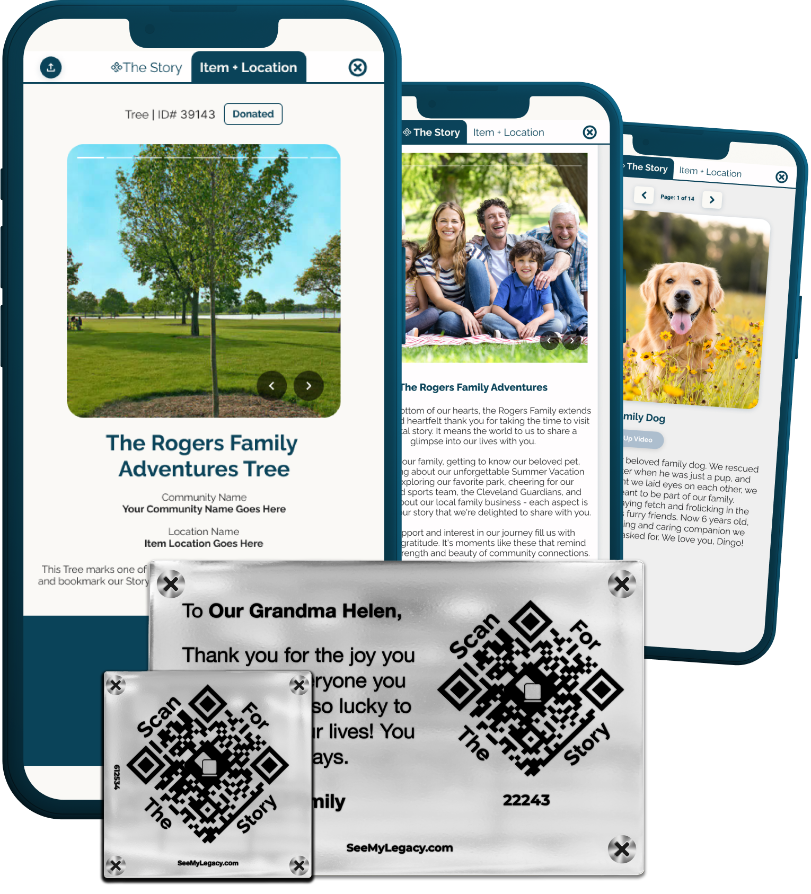
Items represent a physical asset that are geotagged on a map - these Items can become story-enabled and allow your community members to tell beautiful Digital Stories with a QR Plaque. Our Plaques include a QR Code that links out to a Digital Story, which is similar to a scrapbook but with images, text, and links!
Items and Stories work together to showcase the giving in your community and the purpose behind the gift - both physically and digitally through SeeMyLegacy.
Items Power Stories - Physically and Digitally
Physical World
Items represent an asset or object that exists in your Community and can be placed on a map. Appending one of our aluminum QR Plaque to an Item physically means that anyone who sees the plaque can scan the QR code to learn more about the Item and its Story. This is likely already a familiar practice with memorial items, signage, donor walls - you want to recognize the donor with a physical marker.
Digital World - in SeeMyLegacy
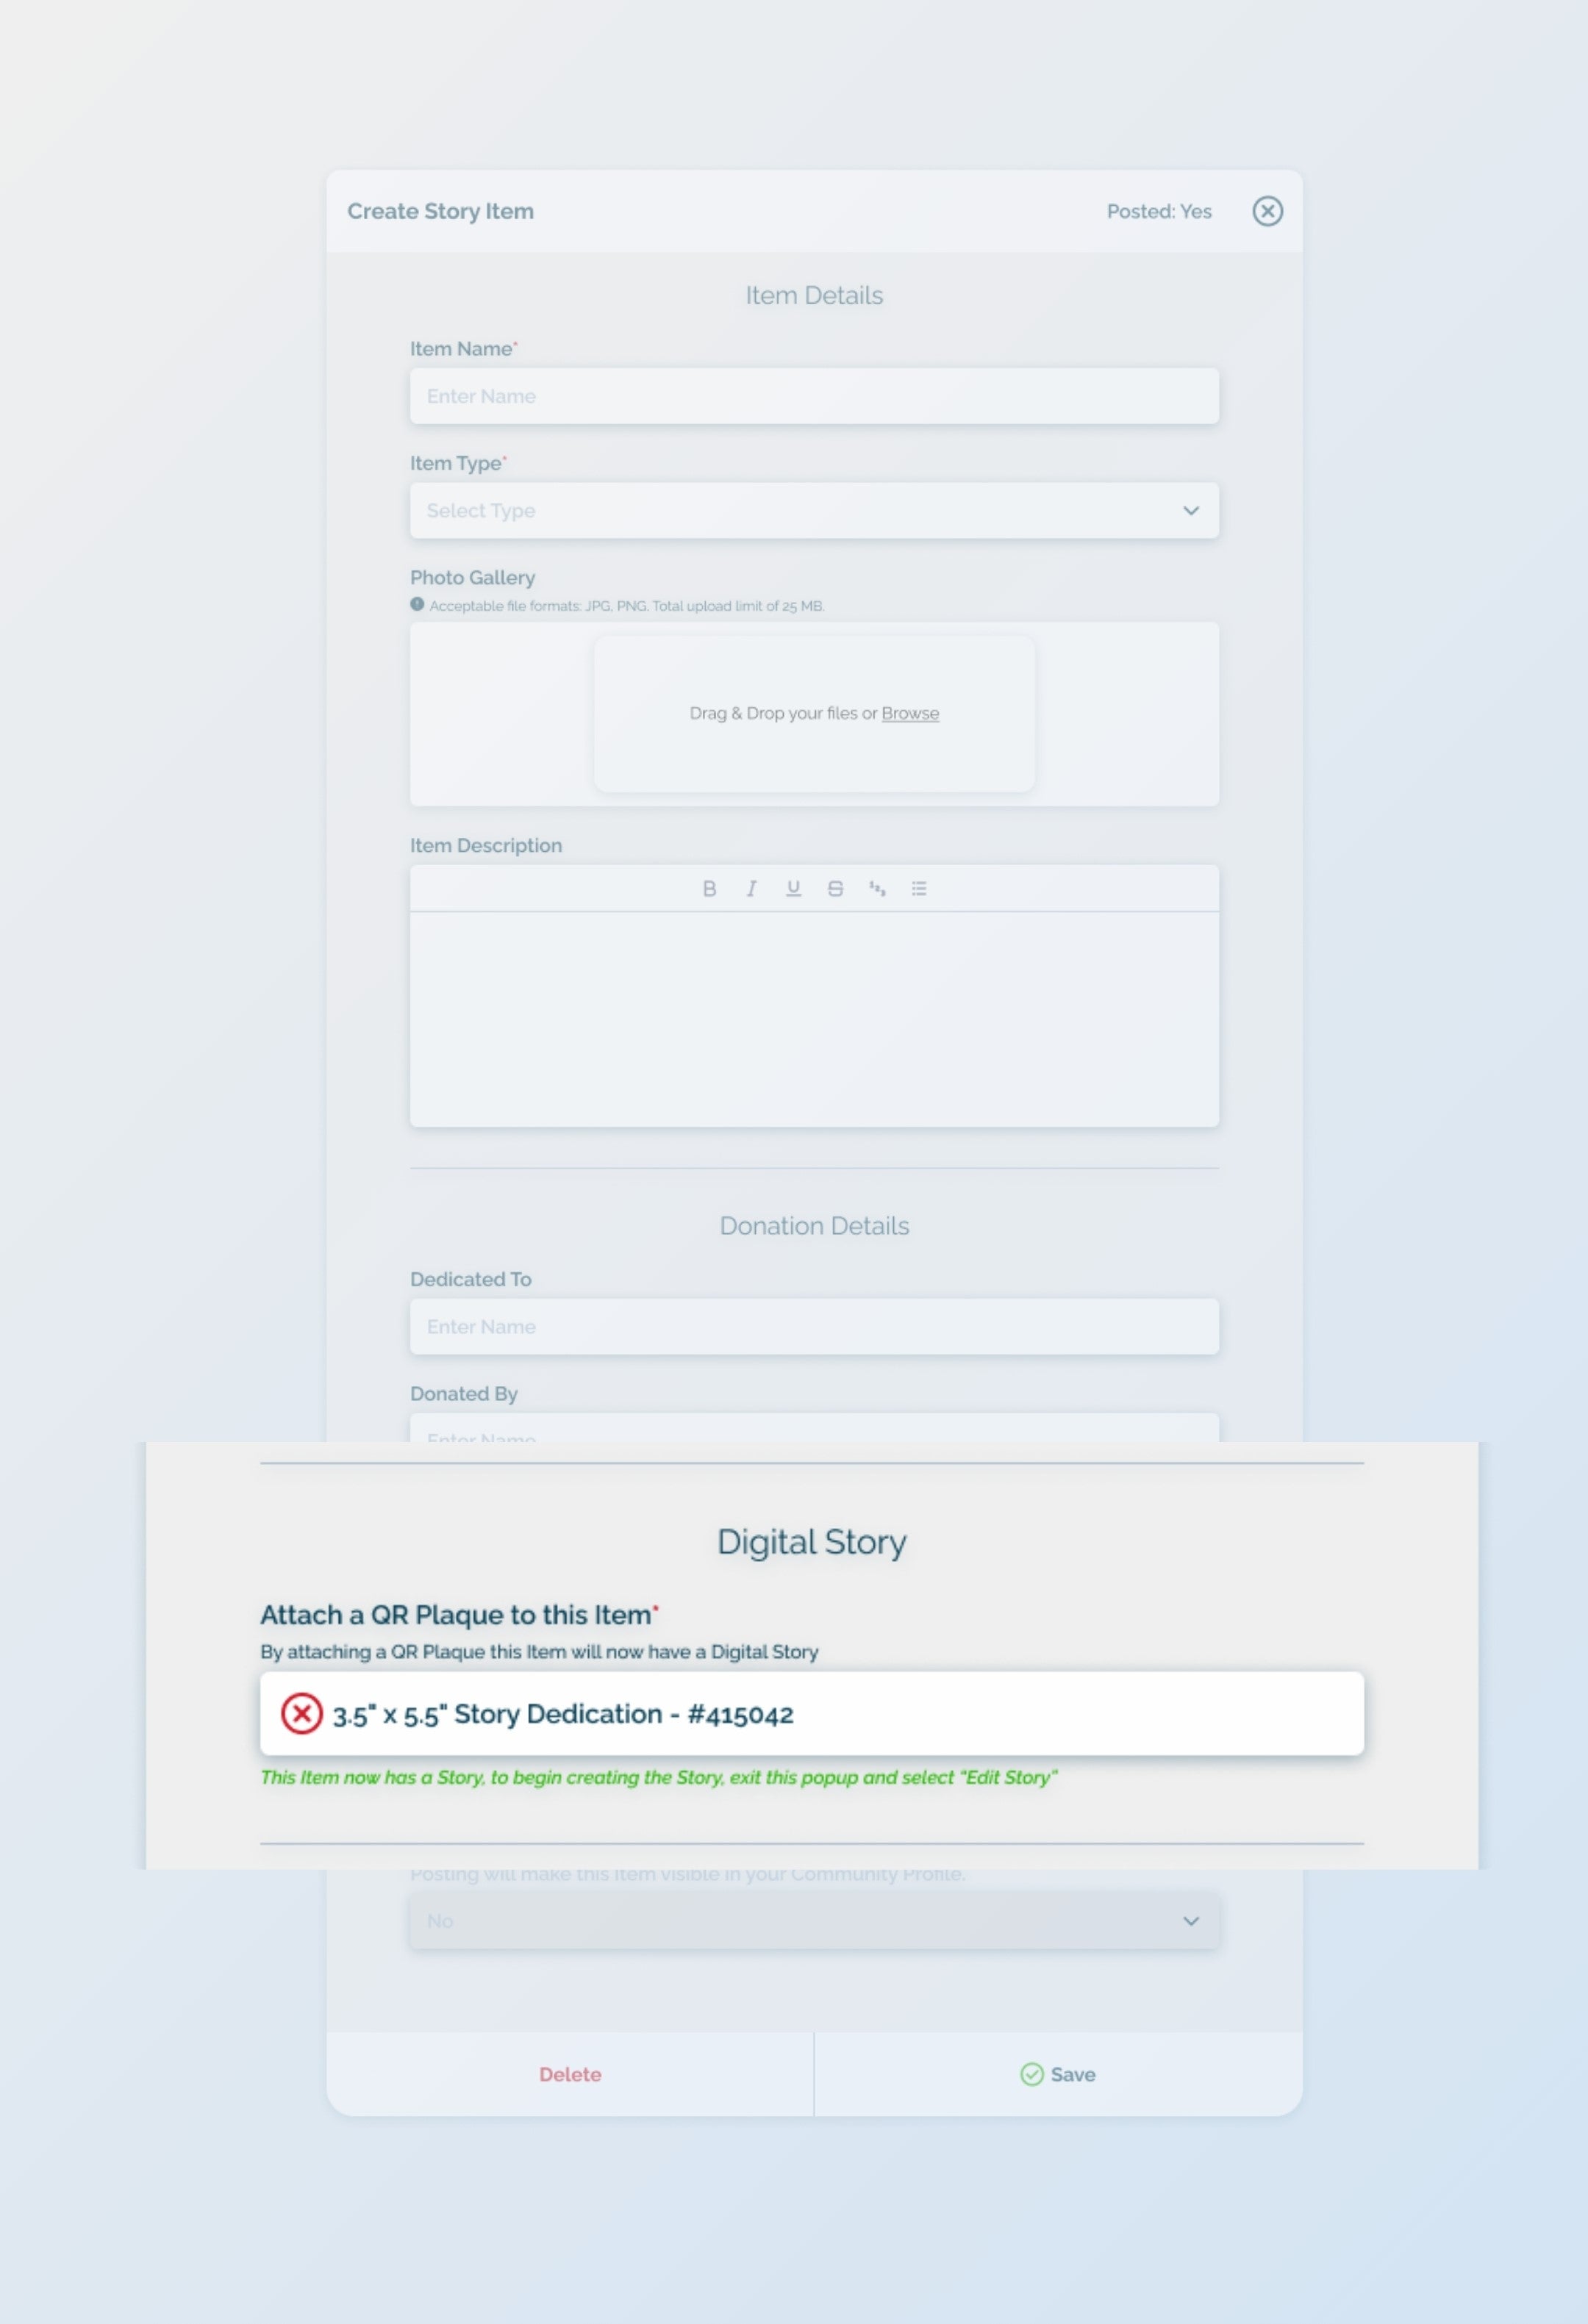
In the same way that Plaques are appended to Items in the physical world, you need to digitally connect them first. Attaching a QR Plaque to an Item in SeeMyLegacy means that the Item will also show the Digital Story, which is how you can showcase your amazing Community Stories! A Storytelling Item can be created to attach one of your Available Plaques to enable the Digital Story, or a Campaign Item can be updated to attach one of your Available Plaques.

Creating & Updating Storytelling Items
Stories can be seen through the 'Community Stories' tab.
- To create a new Storytelling Item - click 'Add Item' and fill out the information as it relates to the physical Item that will have a Digital Story. In the 'Attach a QR Plaque' section, identify one of your available Plaques and link it to your Item to begin telling the Story on your Item.
- Finding your Available Plaques - to see which QR Plaques you have available to attach to an Item, click the 'Available Plaques' tab. This will show any QR Plaques that are not attached to an Item, or those that need extra plaque customization.
- Attaching to a Campaign Item - Within your Campaign, many Items are physical Items that will have a Plaque appended directly to it after being donated/claimed (such as a memorial bench, or a specific pickleball court). You can attach a QR Plaque to a Campaign Item by clicking 'Edit Item' on any Item in your Campaigns tab.

Managing the Story through the Item
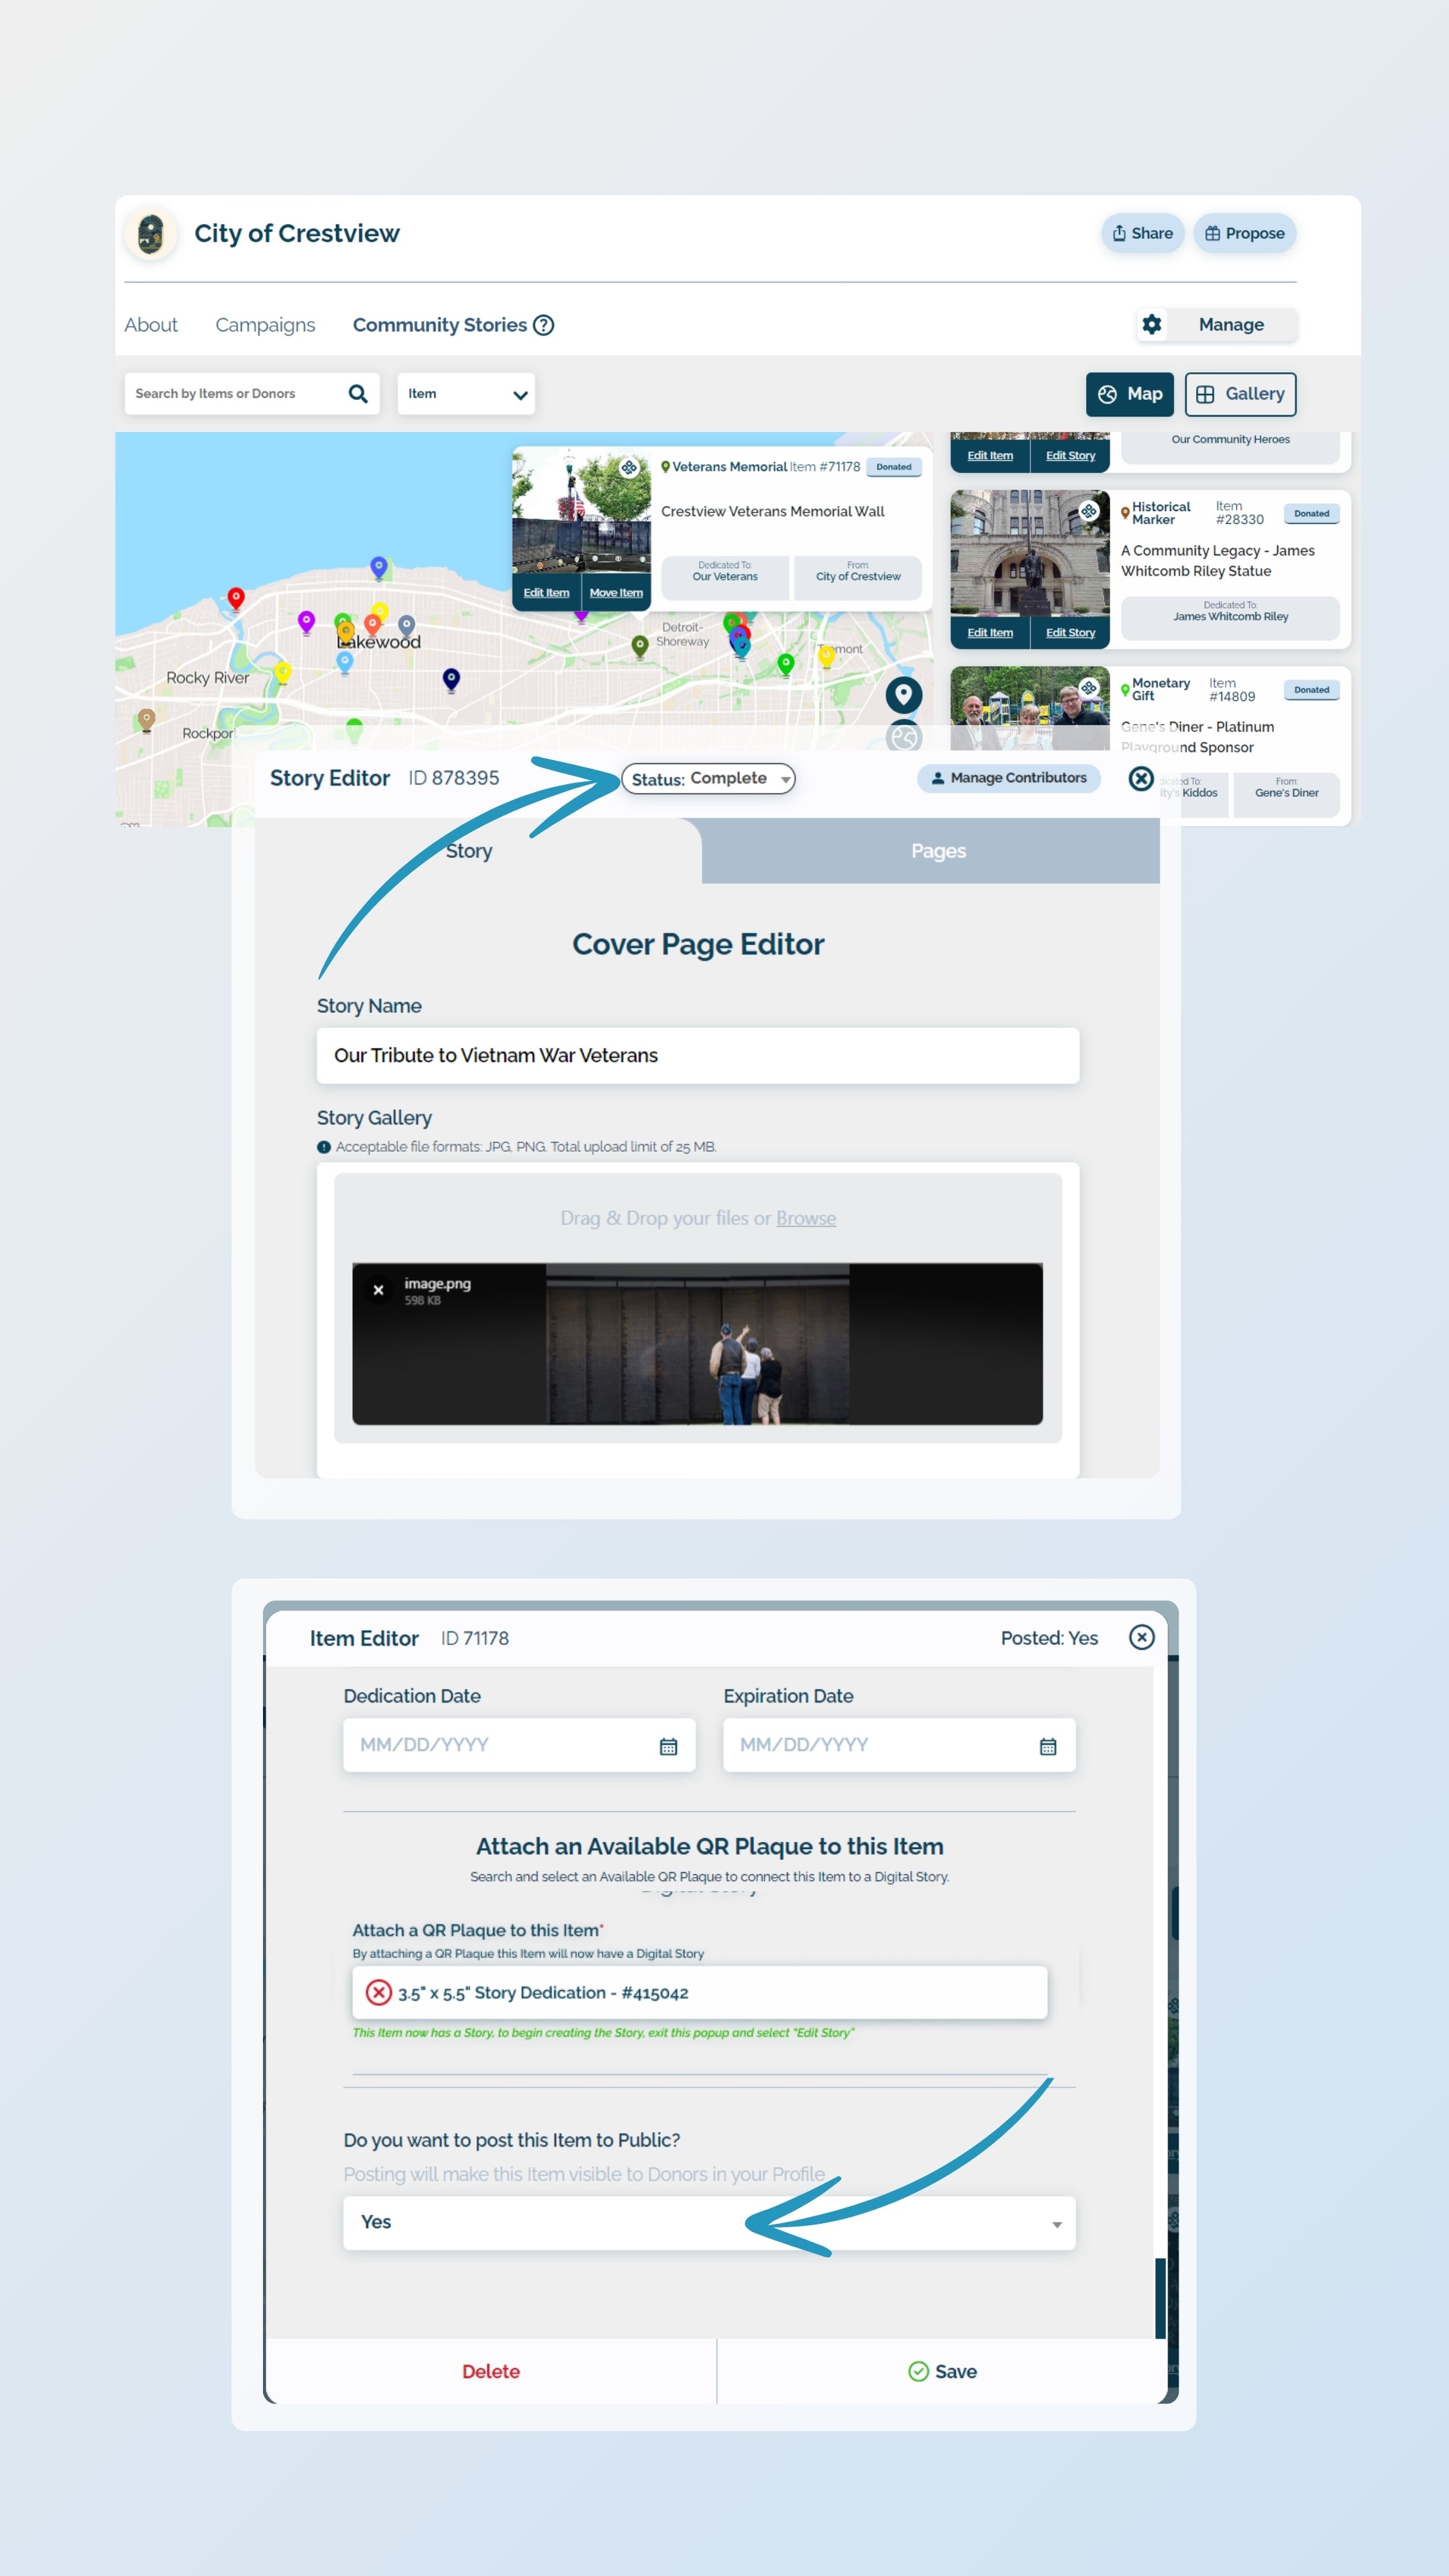
Stories are managed through the 'Community Stories' tab. From here and after creating or updating your Story Item to attach a QR Plaque, you can manage your Story's content and details.
- Click 'Edit Story' to begin creating your Digital Story, or to invite people to collaborate.
- Attach and un-attach your QR Plaque/Digital Story from your Item at any time. Please note, if your Item was not in a Campaign, you will need to create a new Item when you are ready to attach a QR Plaque.
- Stories and Items both have statuses so you can stay in control of what shows on your Profile. To ensure both a Story and its Item can be seen, please click 'Edit Story' to change the Story Status to 'Complete', and ensure that your Item is marked 'Posted = Yes' through the 'Edit Item' pop-up.


